


Blogs
Step-by-step guide: adding Yara and RegRipper to Nuix Workstation

Investigators of all stripes need to get to the evidence for their investigations quickly. If you’ve conducted any kind of digital investigation, you’ve likely needed to rely on several tools to gather and analyze various types of digital evidence. The whole process can be a time-consuming affair.
While it’s unlikely that this will ever change entirely, there are some areas we can improve on. Nuix recently updated extensions to the Nuix Workstation that put the power of two open-source tools directly in your hands: Yara and Regripper.
The Yara extension, used to help malware researchers identify and classify malware examples, is available at https://github.com/NuixSDK/Yara-Integration/releases.The RegRipper extension, which we previously announced, is available to download at https://github.com/NuixSDK/Reg-Ripper/releases/tag/v1.1.1. Both extensions allow you to incorporate the results drawn from the respective open source tools directly into your Nuix case.
Installing the extensions is as easy as downloading the archive, and extracting the included folder to %userprofile%\AppData\Roaming\Nuix\Scripts folder, as illustrated in Figure 1.

Figure 1: Extensions installed in Nuix Workstation
Once the extensions are installed, you’re almost ready to take full advantage of the incredible power that both of these open-source tools bring to your investigations.
REGRIPPER EXTENSION
To being using the RegRipper extension, you first need to download RegRipper and extract the folder within the archive to a file on your analysis system. No other changes to RegRipper or Nuix Workstation need to be made at this point.
To run the RegRipper extension, simply load your case into Workstation, click “Scripts” from the menu bar, and select “RegRipper”, as illustrated in Figure 2.

Figure 2: Selecting the RegRipper extension in a Nuix case
When the script dialog appears, simply fill in the text fields with the appropriate information (you can save configuration information to be loaded at a later date), as illustrated in Figure 3.

Figure 3: Script dialog filled in
Once you’ve completed filling in the text fields, simply click “Ok”, and the extension will begin locating and processing Registry files. If you check “Ingest results on completion,” the results from RegRipper will be automatically added to your Nuix case, as illustrated in Figure 4.
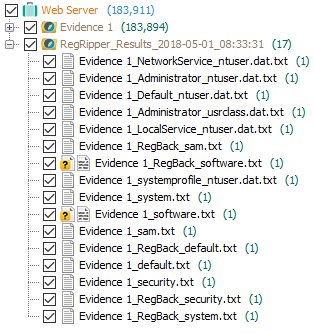
RegRiper results in the Nuix case
The RegRipper extension will parse through the evidence loaded into the Nuix case, locating all hive files, including the AmCache.hve (not included in the Registry, but has the same file format), and then will automatically run the appropriate RegRipper profile against the hive file in order to extract pertinent information from the file. Analysts no longer have to memorize file paths or process multiple user profiles by hand; the extension takes care of all of that for you. Further, the power of RegRipper is accessible directly from Nuix Workstation, and the data provided by RegRipper is automatically incorporated right back into your case.
Further, advanced users of RegRipper are not restricted to just the functionality that comes with the extension; it can be extended even further. If this is something you’re interested in, contact Nuix directly for more information.
YARA EXTENSION
Once you have installed the Yara extension (see Figure 1, above), simply download Yara, install it on your analysis system, and copy the Yara executable to the “yara_executable” folder in the extension installation, as illustrated in Figure 5.

Figure 5: Partial contents of the YaraIntegration.nuixscript folder
Then, be sure to copy your Yara rule files to the “yara_rules” folder. Once you’ve completed these steps, open a Nuix case, and double-click an item (web server folder, etc.) to be scanned. When the item and its descendants appear in the Results window, select all of the items, as illustrated in Figure 6.
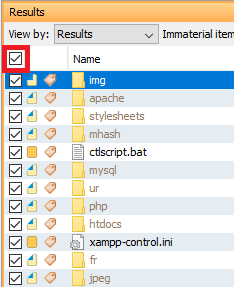
Figure 6: Results pane in Nuix Workstation
Once you’ve selected all items by clicking the check box highlighted in red in Figure 6, click “Scripts” from the menu bar and you’ll see that the Yara Integration option is no longer grayed out; select it. When the Yara Integration dialog appears, note the text fields in the Main tab are already automatically populated with most of the necessary information you’ll need, as illustrated in Figure 7.
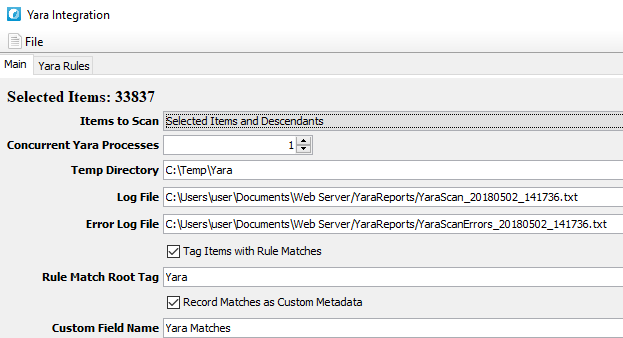
Figure 7: Main tab of Yara Integration dialog
Within the Main tab, be sure to change the “Items to Scan” to “Selected Items and Descendants;” if you want, scan all files and subfolders within the selected path. Next, open the Yara Rules tab in the dialog and select the Yara rule files you want included in the scan, as illustrated in Figure 8.
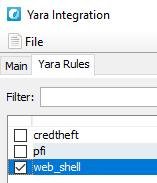
Figure 8: Yara Rules tab of Yara Integration dialog
Once you’ve selected the rule files you want to include in your scan, click Ok. When the extension completes its work, you’ll see any Yara detections listed in the “Review and Tag” Workstation pane, as illustrated in Figure 9.
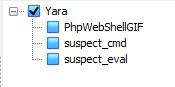
Figure 9: Yara "hits" ready for review
IN THE HANDS OF THE INVESTIGATOR
Nuix Workstation puts a great deal of native functionality in the hands of the investigator—the RegRipper and Yara extensions simply extend that functionality by allowing investigators to leverage powerful open-source tools. Further, these extensions allow organizations to use corporate knowledge and intelligence from previous cases to their advantage, “baking” those capabilities back into Nuix Workstation and extending the capabilities of other investigators.